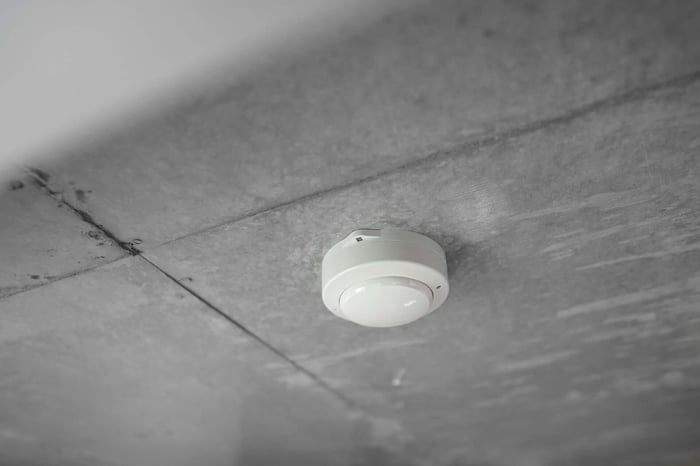

You already know the sound. That single chirp at 2 a.m. that sends you hunting for a chair and a fresh battery in the dark. Or maybe it's quieter than that. You glance at the smoke detector on your hallway ceiling and realize you have no idea when you last tested it, let alone when it was installed.
A smoke detector maintenance schedule fixes both problems. Testing your alarms monthly, cleaning them twice a year, and replacing units every 10 years is the schedule that actually keeps your home protected.
Keep reading for the exact routine, broken down by how often each task needs doing.
What to Do Each Month, Season, and Year
Smoke alarm upkeep breaks into four simple rhythms: monthly, every six months, once a year, and at the manufacturer's replacement date. Missing any one of these can turn a working alarm into a false sense of security.
Most homeowners assume a smoke detector either works or it doesn't. In reality, the sensor inside degrades slowly, and the only way to catch that decline early is to follow a routine instead of waiting for a problem.
Monthly: Test Every Alarm
Press the test button on every smoke alarm in your home once a month and confirm you hear the alarm sound. This single habit catches dead batteries and failed units before they become dangerous.
Pick a day that's easy to remember, like the first Saturday of the month, and test all alarms in one pass. If you have interconnected alarms, pressing the button on one unit should trigger every alarm in the chain.
Every Six Months: Check Power and Clean the Exterior
Twice a year, check your alarm's power source and wipe down the outside casing to clear dust that can block the sensor chamber. Many homeowners tie this to the clock changes for daylight saving time, since it's an easy date to remember.
This is also a good time to check hardwired units for a steady indicator light and battery-powered units for any sign of a weakening charge. A helpful rule of thumb is to check alarms whenever daylight saving time begins or ends, since the reminder naturally repeats twice a year.
Once a Year: Inspect Coverage, Connections, and Records
Annually, walk through your whole home and confirm every room that needs an alarm has one, mounted securely, and wired correctly if interconnected. This is also the moment to update whatever record you're keeping of install dates and test results.
The National Fire Protection Association recommends keeping inspection, testing, and maintenance records for at least one year.
At the Manufacturer's Replacement Date: Install New Units
Every smoke alarm has a replacement date printed inside the unit, and once that date passes, the whole alarm needs to go, not just the battery. Waiting past this date means trusting a sensor that has already lost sensitivity.
Mark this date the moment you install a new alarm, since it's easy to lose track of over a decade of ownership. The next section covers where these alarms belong in your home before testing routines even start.
Start With the Right Alarms in the Right Places
Your testing schedule only works if you have the right alarms installed in the right spots. Placement decides whether an alarm gives you enough warning time or misses the fire entirely.
Homes built at different times often have coverage gaps, especially if additions or renovations happened without updating the alarm layout. Before diving into testing mechanics, confirm your home's coverage matches current recommendations.
Where Your Home Needs Smoke Alarms
Every bedroom, every hallway outside sleeping areas, and every level of your home, including the basement, needs its own smoke alarm. The NFPA also recommends alarms inside each sleeping room for the strongest protection, based on its installation guidance.
A common gap shows up in finished basements, where homeowners forget to extend coverage below the main floor. Another shows up in additions, where a new bedroom gets furniture and paint but never gets its own alarm.
Here's a quick placement checklist to run through room by room:
- One alarm inside every bedroom
- One alarm in the hallway outside sleeping areas
- One alarm on every level, including basements and attics used as living space
- Alarms at least 10 feet from cooking appliances to avoid false alarms
- Interconnected alarms if your home has more than one level
When a Heat Alarm Makes More Sense
A heat alarm makes more sense than a smoke alarm in kitchens, garages, and attics where cooking steam or dust regularly trigger false smoke alarms. Heat alarms respond to a rapid temperature rise instead of airborne particles.
Garages are a common spot for this swap, especially if you park a car that's still warm from driving or store a grill nearby. Attics with limited ventilation also benefit, since dust and heat buildup can set off a standard smoke alarm for no real reason.
How Interconnected Alarms Change Your Testing Routine
Interconnected alarms mean testing one unit should sound every alarm in your home at once, which changes how you verify your system works. If pressing the test button on one alarm doesn't trigger the others, the connection itself has failed, not just the battery.
This matters most in larger homes where a fire on one floor needs to wake people sleeping on another. Test from a different alarm each month to confirm the whole chain responds, not just the one you always reach first.
How to Test, Clean, and Inspect Each Alarm
Properly testing an alarm takes less than a minute per unit, but skipping the details is how homeowners miss early warning signs. Each step below catches a different kind of failure.
Beyond the test button, cleaning and a visual check tell you things a sound alone can't. A working alarm coated in dust or mounted loosely still won't fully protect you.
Use the Test Button and Listen for Every Connected Alarm
Press and hold the test button until you hear the alarm sound, then confirm every interconnected unit sounds too. If a unit stays silent, that's a failure worth addressing immediately, not at the next scheduled check.
Test from a step stool or ladder so you can also glance at the unit up close while you're there. This is the moment to notice discoloration, cracked casing, or a mounting bracket that's come loose.
Remove Dust Without Damaging the Sensor
Clean the exterior vents with a vacuum brush attachment or a soft cloth, never compressed air aimed directly into the sensor chamber. Blasting compressed air into the unit can push dust deeper into the sensor and damage the internal mechanism, an approach the same NFPA maintenance guidance specifically warns against.
A soft-bristle brush works well for the vent slots where dust tends to collect. Do this every six months alongside your power check, since dust buildup is one of the most common causes of false alarms and delayed responses.
Check for Loose Mounting, Paint, and Airflow Problems
A smoke alarm mounted loosely, painted over, or blocked by furniture can't do its job even with a fresh battery. Confirm the bracket is screwed in tight and the sensor openings are completely clear.
Painted-over alarms are more common than most homeowners realize, especially after a ceiling repaint where the alarm wasn't removed first. If you find paint on the vents, replace the unit rather than trying to clean it, since paint can permanently block the sensor.
What a Chirp, Silence, or False Alarm Can Mean
A single chirp every 30 to 60 seconds usually signals a low battery or an alarm reaching the end of its life, not a random glitch. Total silence during a test means either a dead unit or a broken connection that needs immediate attention.
Frequent false alarms, especially ones tied to cooking or steam, often mean the sensor itself is degrading rather than the room being genuinely smoky. Single chirps at regular intervals can point to end-of-life sensor issues rather than a simple low battery, which is worth ruling out before you assume a new battery will fix it.
Replace Batteries and Expired Alarms Before They Fail
Battery replacement and unit replacement follow two different clocks, and mixing them up is how expired alarms stay in service longer than they should. Batteries typically need yearly attention, while the whole unit has a hard 10-year limit.
Knowing your alarm type changes what maintenance actually means for that unit. A sealed-battery alarm, for example, doesn't let you swap a battery when it starts chirping.
Battery-Powered vs. Hardwired vs. Sealed-Battery Alarms
Battery-powered alarms need a fresh battery about once a year, hardwired alarms rely on your home's electrical system with a battery backup, and sealed-battery units run on a single non-replaceable battery for the alarm's full life. Knowing which type is mounted on your ceiling changes your entire maintenance approach.
- Battery-powered: Replace the battery annually, even if it hasn't chirped yet
- Hardwired: Test the battery backup every six months in case of a power outage
- Sealed-battery: No battery replacement needed; the whole unit gets replaced at the end of its rated life, often 10 years
How Long Smoke and Combination Alarms Typically Last
Most smoke alarms last 10 years from the manufacture date, after which the sensor can no longer reliably detect smoke even if the test button still works. Combination smoke and carbon monoxide alarms often carry a shorter lifespan, closer to five to seven years, depending on the manufacturer.
A unit that passes its monthly test can still fail during an actual fire if it's past its rated life, since the test button only checks the circuit, not the sensor's sensitivity. This is one of the least understood facts about home fire safety, and it's exactly why the replacement date matters more than whether the alarm currently makes noise.
How to Find the Manufacture or Replacement Date
The manufacture date is printed on a label on the back or side of the alarm, and some models also print a specific replace-by date. Pop the unit off its mounting bracket and check both sides if the date isn't immediately visible.
If you can't find a date at all, treat the alarm as due for replacement, since an unreadable label is itself a sign of an aging unit. Photograph that label the day you install a new alarm so you won't have to hunt for it again when the replacement question comes up years later.
When to Call a Qualified Electrician or Fire-Safety Professional
Call an electrician when a hardwired alarm won't stop chirping after a battery swap, or when you're adding interconnected alarms to an older home's wiring. Wiring issues behind the wall are outside what a homeowner should troubleshoot alone.
Call a fire-safety professional if you're unsure whether your current alarm layout meets code, especially after a renovation or addition. Getting this checked once means your testing routine going forward actually covers every room that needs it.
Keep Dates You Can Find When They Matter
A maintenance schedule only works if you can find the dates it depends on, and most homeowners lose track within a year or two. Writing dates down somewhere permanent turns a mental guess into an answer you can check in seconds.
Picture a combination smoke and CO alarm installed in a hallway outside the bedrooms. Without a record, you'd have to climb up, pull it down, and squint at a tiny printed label just to know if it's due for replacement. With a logged install date, you can find that answer in seconds.
What to Record for Every Smoke, Heat, and CO Alarm
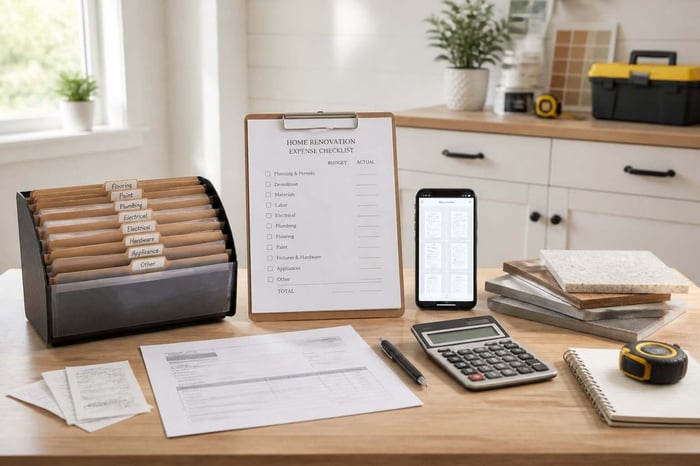
For each alarm in your home, record the install date, manufacture date, alarm type, battery type, and last test date. This turns a home full of separate units into one list you can scan in a minute.
- Install date and manufacturer's replace-by date
- Alarm type (smoke, heat, or combination smoke/CO)
- Battery type, or confirmation it's hardwired or sealed
- Location in the home
- Date of the most recent test and any issues found
How to Set Reminders That Match Your Alarm Type
Set separate reminders for monthly testing, six-month battery and cleaning checks, and the 10-year replacement date, since one generic reminder won't cover all three needs. A reminder tied to your actual alarm type is more useful than a general "check smoke alarms" note.
This is where a tool built for home records earns its place. Manse lets you log each alarm's install date and alarm type once, then sends reminders tied to that specific schedule instead of a one-size-fits-all alert, the same way it works for a broader annual home maintenance checklist covering the rest of the house. The next step is putting that documented routine to work across your whole home.
Frequently Asked Questions
How often should I test my smoke detectors?
Test every smoke detector once a month by pressing the test button and confirming the alarm sounds. If your alarms are interconnected, one press should trigger every unit in the home at the same time.
How often should a smoke detector be serviced?
Clean the exterior and check the power source every six months, and do a full inspection of placement and connections once a year. After that, replace the entire unit once it reaches its manufacturer's replacement date, usually around 10 years.
Do hardwired smoke alarms need battery replacement?
Yes, most hardwired alarms include a battery backup that needs checking every six months and replacing at least once a year. The battery keeps the alarm working during a power outage, so an old backup battery leaves you unprotected exactly when you might need it most.
What is the typical lifespan of a hardwired smoke detector?
A hardwired smoke detector typically lasts about 10 years from its manufacture date, the same rule that applies to battery-powered units. Combination smoke and carbon monoxide alarms often have a shorter lifespan, so check the specific rating printed on your unit.
How do I stop my hardwired smoke alarm from chirping?
First, replace the backup battery, since a low battery is the most common cause of chirping in a hardwired unit. If chirping continues after a fresh battery, the unit may be past its replacement date or facing a wiring issue that calls for an electrician.
How can I tell when a smoke alarm needs to be replaced?
Check the manufacturer or replace-by date printed inside the unit; once that date passes, replace it regardless of whether it still tests fine. Frequent false alarms, a faded or unreadable date label, and single chirps every 30 to 60 seconds are also signs the alarm has reached the end of its useful life.
A Documented Routine Helps Protect Your Home
A written, dated maintenance routine turns smoke alarm upkeep from a guessing game into a habit you can actually verify. Fire departments and safety organizations recommend keeping these records for a reason: memory fades, but a dated log doesn't.
This matters beyond your own peace of mind. If you ever sell your home, a documented alarm history shows a buyer exactly what's installed and when it's due for replacement, which builds trust during a walkthrough or inspection.
It also matters if you're the one buying. Inheriting a home with alarms of unknown age means starting your own tracking from scratch, ideally the same week you get the keys. A private, encrypted home profile in Manse keeps that information yours, accessible whenever you need it, and free to start in minutes.
Once you log your smoke alarm schedule, the same habit extends naturally to warranties, manuals, and other home maintenance tasks.