
A home inspection sits at the center of one of the most stressful moments in a real estate deal. To avoid surprise repairs that kill contracts, both buyers and sellers need a reliable home inspection checklist. At Manse, we believe the best way to navigate this process is with clear information and proactive planning.
The best way to walk into an inspection without that fear is to already know what inspectors look for, room by room and system by system. That knowledge lets buyers ask sharper questions and gives sellers a clear list of problems to fix before the report comes back. Most inspection surprises are not actually surprises to anyone who looked carefully first.
This guide covers everything from the roof to the foundation and is designed to keep your records intact after closing day. Each section is specific enough to use on your phone while walking through any property.
How to Use This Inspection Guide as a Buyer or Seller
Whether you are buying or selling, this guide works differently depending on which side of the transaction you are on. Understanding your role before you start reading keeps you from treating every item on this list the same way.
Questions Buyers Should Bring to the Inspection
Buyers tend to stay quiet during inspections and wait for the report. That is a missed opportunity. Your inspector is on site for two to four hours, and the best time to learn about the house is while they are in it.
Bring a short list of questions you already know you want answered based on the listing. If the home is more than 20 years old, ask specifically about the ages of the roof, water heater, and HVAC equipment. If the listing photos show a finished basement, ask the inspector to check for moisture intrusion, not just visible water damage.
Pay attention to which defects the inspector flags as "monitor" versus "repair immediately." Those two categories carry very different costs and urgency. A buyer who understands the difference can negotiate more precisely instead of demanding a blanket repair credit.
Fixes Sellers Should Handle Before Listing
Sellers who skip a pre-listing walkthrough often hand buyers a long inspection report full of small, easy problems that make the whole house feel neglected. A leaky faucet, a missing outlet cover, and a tripped GFCI that never got reset are cheap to fix but expensive in perception.
Focus your pre-listing repairs on anything visible, anything that involves water, and anything safety-related. Those three categories create the most friction in buyer negotiations. A cracked caulk line around a tub, a slow drain in the hall bathroom, and a missing smoke detector are all fixable in an afternoon.
Sellers who fix cosmetic and minor functional issues before the inspection give buyers less to anchor a price reduction on. The goal is not a perfect report; it is a report focused solely on the structural and mechanical items that genuinely require expert attention.
Roof, Drainage, and Exterior Condition
The roof is the first thing an inspector looks at and often the first thing that changes a deal. Problems here are expensive, and buyers who see a flagged roof tend to get cautious about everything else in the report.
Shingles, Flashing, and Signs of Active Leaks
Missing or curling shingles are easy to spot from the ground with binoculars. What is harder to see is failing flashing around chimneys, skylights, and pipe boots. Flashing is where most active roof leaks actually start, not in the field of the shingles.
Inside the home, look for water stains on the ceilings of top-floor rooms and on the attic sheathing. Dark rings or soft spots on drywall near exterior walls often indicate a slow, chronic leak. Ask your inspector to confirm whether any staining is active or old and dry.
A roof flagged as "near end of useful life" does not necessarily mean immediate replacement. It means you need a roofing contractor's estimate before you close so you know the actual cost.
Gutters, Grading, and Water Runoff Risks
Gutters and grading are among the most ignored items on any pre-listing checklist, and they cause some of the most expensive downstream problems. Gutters that are clogged, pulling away from the fascia, or missing end caps funnel water directly against the foundation.
Grading refers to the slope of the soil around the home. Ideally, the ground slopes away from the foundation at a rate of about one inch per foot for the first six feet. Soil that has settled flat or, worse, slopes toward the house traps water against the foundation wall.
Both of these issues are inexpensive to correct before a sale but show up clearly in inspection reports when ignored.
Siding, Windows, Doors, and Exterior Trim
Cracked, rotting, or missing siding lets water into the wall cavity behind it. This is one of those problems that looks cosmetic from the street but turns into a mold or structural issue after years of water intrusion. Pay close attention to wood trim around windows and doors, particularly where it contacts the ground or a horizontal surface.
Windows get flagged for two main reasons: failed double-pane seals (visible as fogging between the glass layers) and missing or damaged weatherstripping. Neither is structurally serious, but both affect energy costs and are easy for a buyer to use as negotiation points.
The exterior also sets the tone for what buyers expect to find inside, so sellers who address visible rot, peeling paint, and damaged caulking tend to get less skeptical buyers walking through the door.
Foundation, Structure, and Moisture Clues
Foundation problems are the finding that buyers fear most, and for good reason: repair costs range from a few hundred dollars for minor crack sealing to tens of thousands for full stabilization work. Knowing how to read the signs before the inspection report arrives gives you real leverage.
Cracks, Settlement, and Uneven Floors
Not all cracks are serious. Hairline cracks in poured concrete are common and usually cosmetic. Wide horizontal cracks in a block foundation wall are a different story; they suggest lateral pressure from the soil and should be evaluated by a structural engineer, not just a general inspector.
Walk through every room and pay attention to floors that feel bouncy or slope noticeably in one direction. Doors and windows that stick, especially on the interior of the home where humidity is controlled, often indicate the frame has shifted. These are the kind of physical clues that lead to bigger findings in the report.
Basement and Crawl Space Warning Signs
Basements and crawl spaces are where moisture problems hide longest. Look for white powdery residue on concrete walls, which indicates past water intrusion. Efflorescence is not a current leak, but it confirms water has moved through that wall before.
Active moisture shows up as dark staining, rust on metal components, or wood that feels soft when pressed. A musty odor in a basement or crawl space almost always means moisture is present somewhere, even if you cannot see it.
Inspect wood beams in the crawl space for rot and for evidence of insect damage. Termite damage often appears as hollow-sounding wood or tunnels of dried mud running along wood surfaces.
Attic Ventilation and Insulation Gaps
Poor attic ventilation is one of the most consistently underestimated items in an inspection report. Without proper airflow, heat builds up in summer and moisture condenses in winter, both of which shorten the life of the roof sheathing and the shingles above it.
Check that soffit and ridge vents are present and unobstructed. Insulation pushed up against the soffit vents blocks airflow even when the vents themselves are intact.
Gaps in the attic insulation layer show up as cold spots on upper-floor ceilings in winter and as high summer cooling bills. An inspector who spots these gaps during a July inspection is saving you from a long-term energy drain.
Plumbing, Electrical, and Major Mechanical Systems
These four systems are what inspectors spend the most time on, and they are the categories most likely to produce findings that directly affect a buyer's willingness to proceed. Understanding what each one involves before you walk in saves you time and reduces the anxiety of hearing unfamiliar terms during the walkthrough.
Supply Lines, Drains, and Water Pressure Issues
Run every faucet in the home and time how long it takes for hot water to arrive at the farthest fixture from the water heater. Slow hot water can indicate a small water heater or a failing one. Low water pressure throughout the home may point to a partially closed main shutoff, mineral buildup in older pipes, or a pressure-reducing valve that needs adjustment.
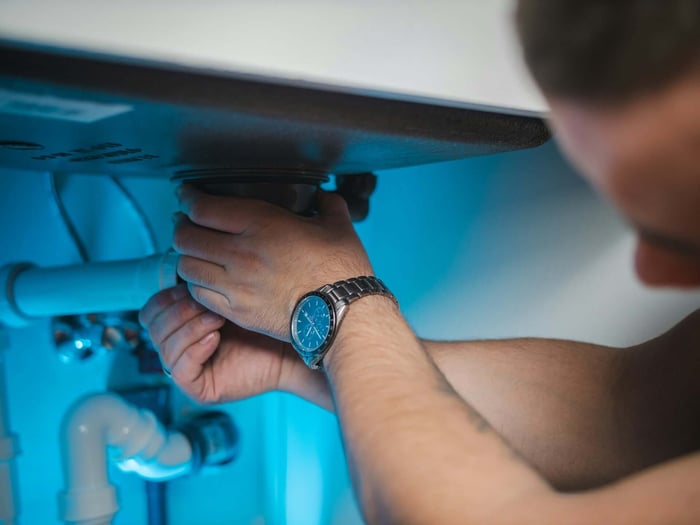
Check under every sink for evidence of past leaks: water stains on the cabinet floor, swollen particleboard, or rust rings around the drain trap. These are quick visual checks that often reveal chronic problems a seller never addressed.
Older homes with galvanized steel supply pipes experience significant pressure drops as the interior of the pipes corrodes and narrows over decades. Ask the inspector to note any galvanized pipe still in service.
Panel Safety, Wiring Defects, and GFCI Protection
Open the electrical panel and look for double-tapped breakers (two wires connected to a single breaker terminal), which is a common defect in panels that were upgraded over time without proper expansion. Also look for signs of heat damage: burn marks, melted insulation, or breakers that feel warmer than others.
GFCI outlets are required within six feet of any water source, including all bathrooms, the kitchen, the garage, and outdoor outlets. Test every GFCI with the test button. A GFCI that does not trip is a safety defect.
Aluminum branch circuit wiring, common in homes built between 1965 and 1973, requires special outlets and connections. Standard outlets and wire nuts are not rated for aluminum wire and create a fire risk over time.
Furnace, Air Conditioning, and Heat Exchanger Concerns
Turn the furnace on during the inspection even if it is July. You want to confirm ignition, airflow, and heat output while the inspector is present. A cracked heat exchanger is one of the most serious HVAC findings because it allows combustion gases, including carbon monoxide, to mix with circulated air. This defect requires furnace replacement, not repair.
For central air conditioning, the inspector will check the insulation on the refrigerant lines, the condition of the outdoor condenser coils, and whether the system actually cools. Age matters here: an AC unit more than 15 years old is approaching the end of its expected lifespan, regardless of how it performs on inspection day.
Ask the inspector when the filters were last changed. A clogged filter tells you something about how the previous owner maintained the system.
Water Heater Age, Capacity, and Failure Risks
A water heater's age is stamped in the serial number. The format varies by manufacturer, but the year is almost always encoded in the first two or four characters. Most tank water heaters last 8 to 12 years; anything past that range in a buyer's inspection is a near-term replacement cost.
Look for rust at the top connections, corrosion at the anode rod port, or water staining on the floor beneath the unit. Any of these indicate the tank is degrading internally. A tank that shows these signs should be replaced before it fails, not after.
The pressure relief valve should have a discharge pipe that terminates within six inches of the floor or outside the building. An improperly terminated T&P valve is a safety violation that any inspector will flag.
Appliances, Safety Devices, and Final Red Flags
Built-in appliances and safety devices are the last items most inspectors check, but they produce some of the most negotiable findings in the report. A seller who hands over a home with missing smoke detectors and a range hood that does not vent will see those items on every buyer's request list.
Built-In Appliance Condition and Missing Records
Run every built-in appliance during the inspection: dishwasher, range, oven, range hood, garbage disposal, and microwave if built-in. Confirm that each one turns on, cycles through, and drains or vents correctly. The dishwasher drain hose should loop up to the underside of the counter before it connects to the drain, a detail called a high loop that prevents backflow.
Missing manuals and warranty records for built-in appliances are more than an inconvenience. They mean the new owner has no way to verify the unit's age, confirm whether a warranty is still active, or know the correct maintenance schedule. Sellers who cannot produce records for appliances should, at a minimum, note the brand and model number on a disclosure sheet.
This is exactly where many homeowners feel the pain months after closing. The dishwasher breaks down, there is no paperwork, and the owner has no idea whether it is still under the manufacturer's warranty or how old the unit actually is. Add your home to Manse for free and keep all appliances, manuals, and maintenance tasks in one private place.
Smoke Alarms, Carbon Monoxide Detectors, and Egress
Smoke alarms are required on every level of the home, inside each sleeping area, and outside each sleeping area. Carbon monoxide detectors are required on any level with a fuel-burning appliance or an attached garage. Both devices have a lifespan of 7 to 10 years, after which they should be replaced entirely, not just have their batteries swapped.
Test every alarm during the inspection. Many sellers replace batteries before a showing but leave detectors in place that are years past their functional lifespan. A detector that chirps when tested but was installed in 2013 is not a functioning safety device.
Egress in bedrooms, the minimum window size required for emergency escape, is a code item that inspectors check in finished basements and converted rooms. A bedroom window that is too small or painted shut creates both a safety issue and a potential code violation.
Which Findings Are Cosmetic and Which Can Change the Deal
Not every item in an inspection report carries the same weight. Buyers who treat every finding as equally urgent lose credibility in negotiations. Sellers who panic over a long report before reading it closely make unnecessary concessions.
Safety defects are the non-negotiables. A cracked heat exchanger, an improperly wired subpanel, or a foundation with active structural movement require resolution before a responsible buyer should close. Everything else is a matter of negotiation and relative cost.
Turn Findings Into Repairs, Records, and Next Steps
The inspection report is only useful if you actually act on it. That sounds obvious, but most buyers and sellers let the report drive the negotiation and then file it somewhere and forget it exists.
How to Prioritize Negotiations and Repair Requests
Focus your repair requests on three categories: safety defects, items that affect insurability, and major mechanical systems near the end of their useful life. These are the findings that have real financial consequence. Asking a seller to repaint trim or re-caulk a shower gives the impression you are looking for reasons to renegotiate rather than addressing real risk.
Buyers have three main options after an inspection: request repairs, ask for a price reduction or closing credit, or accept the home as-is and build the costs into your post-closing plan. A closing credit often makes more sense than seller-completed repairs because you control the quality and timing of the work.
Sellers negotiating over an inspection report should get independent contractor estimates before accepting a buyer's repair credit request. Buyers sometimes inflate repair costs. An independent quote gives you a fair counter.
What Documentation to Save After the Inspection
The inspection report itself is the first document to save. Keep the full PDF, not just the summary page. Inspectors often note items in the body of the report that never make it onto the summary, and those details matter later when something actually fails.
The full inspection report PDF with all photos
Any contractor estimates for flagged repairs
Model numbers and ages of all major appliances noted in the report
Warranties on repairs completed before or after closing
The inspector's license number and contact information
Any specialist reports ordered as follow-ups (sewer scope, radon, structural)
If the seller completed repairs before closing, obtain receipts and the contractor's contact information in writing. A repair with no documentation is worth very little if the same problem reappears after you move in.
Frequently Asked Questions
What Should You Check First When You Walk Through a House to Avoid Missing the Big Problems?
Start with water. Look at ceilings for stains, check under sinks for past leaks, and walk the basement or crawl space for signs of moisture. Water damage is the most common and most expensive pattern you will find, and it usually connects to multiple other systems.
What Should a Buyer Inspect That the Seller and Listing Photos Usually Do Not Reveal?
Sellers control what photos show, but they cannot hide a musty basement smell, a panel full of double-tapped breakers, or a water heater that is a decade past its lifespan. Focus your attention on anything behind a door or panel, anything underground or in the attic, and anything that runs on water or electricity.
What Should a Seller Fix Before a Buyer's Inspection so the Report Does Not Come Back Packed With Easy Issues?
Address anything visible, anything safety-related, and anything involving water. Replace dead smoke detector batteries and any detectors older than 10 years. Fix dripping faucets, re-caulk gaps around tubs and sinks, and make sure every outlet and light switch cover is in place. These small items create a bad first impression in a report.
How Do You Do a DIY Walk-Through Without Tools and Still Catch the Red Flags That Matter?
Use your eyes, your nose, and a light tap of your knuckle on wood surfaces. Look for staining patterns on ceilings and floors. Smell for mildew in the basement and garage. Knock on wood trim and sill plates to check for hollow spots that indicate rot or insect damage. Run every faucet, flush every toilet, and flip every switch.
What Belongs on a Printable Checklist You Can Take Room to Room, Including the Outside of the Home?
A practical room-by-room checklist should include: ceiling and wall staining, floor levelness, door and window operation, outlet and switch function, visible plumbing connections, and ventilation in wet areas. Outside: grading direction, gutter condition, siding gaps, and visible roof shingles. Each item should take under 30 seconds to check; if it takes longer, you have already found something to investigate.
How Do You Organize Your Inspection Notes and Photos so You Can Reference Them Later Without Losing Control of Your Records?
Take photos organized by room and label them the same day while your memory is fresh. Store the full inspection PDF alongside your notes rather than in a separate email thread or folder. The homeowners who struggle most are the ones who split their records across email attachments, text threads, and paper files. A single location for the report, photos, and appliance details makes everything faster to find when you actually need it.
Build the Record Your Next Buyer Will Thank You For
Every finding in an inspection report is a decision point. Some need immediate action, some need a contractor estimate, and some just need to be documented so they are not forgotten in six months. The inspection is the most complete picture of your home's condition you are ever likely to have in one place.
Treat that information as a starting record, not just a transaction document. The homeowners who stay ahead of maintenance costs are not doing anything complicated. They simply know what they own, when it was installed, and when it needs attention.
Done troubleshooting? Track that appliance in Manse, so the next time something goes wrong, the manual and warranty are already there.