
Your air conditioner works hardest on the days you need it most. When it breaks down on a 95-degree afternoon, the repair bill is rarely the worst part. The worst part is that routine air conditioner maintenance and a simple spring checkup would have caught the problem months earlier.
A few skipped maintenance tasks can turn a minor fix into a major expense. A dirty filter, a clogged drain, or a neglected outdoor unit can cause a system to fail with little warning. Most homeowners only find out something was wrong after the AC stops cooling.
Keep reading to learn exactly what to check each season, which tasks you can handle yourself, and which ones need a professional. This Manse guide gives you a clear, step-by-step checklist from spring startup to fall shutdown, so you never have to guess what comes next.
Why Small AC Tasks Matter Before Summer Hits
Skipping routine upkeep puts real money at risk. A system that does not get basic attention before cooling season often fails during the first heat wave, when repair costs are highest, and technicians are hardest to book.
What Skipping Upkeep Can Cost You
A dirty air filter alone can raise your energy bill by 5 to 15 percent. Restricted airflow makes the compressor strain harder, and compressor replacements run between $1,200 and $2,500. That is the kind of repair that makes a $150 annual tune-up look like an obvious decision.
Neglected systems also have shorter lifespans. A well-maintained central air conditioner typically lasts 12 to 15 years. One that misses service year after year often reaches failure at 8 to 10 years. The cost difference between those two outcomes is easily in the thousands.
Consequence of Skipping Maintenance | Typical Cost Impact |
Higher monthly energy bills | 5 to 15 percent increase |
Compressor failure | $1,200 to $2,500 |
Emergency service call in summer | $150 to $500 or more |
Early system replacement | $4,000 to $12,000+ |
Condenser coil cleaning (reactive) | $100 to $400 |
Warning Signs Your System Needs Attention
Some problems announce themselves clearly. Weak airflow, warm air blowing from vents, grinding or rattling sounds, and sudden spikes in your electric bill are all signs the system is under stress. Do not wait for these to resolve on their own.
Other signs are quieter. If your home takes longer to reach the thermostat setting than it did last summer, or if some rooms cool unevenly, the system is working harder than it should. Water pooling near the indoor unit is another sign of a specific problem covered later in this guide.
Catching these early is the entire point of a seasonal schedule. Once you know what to look for, the spring checklist becomes less of a chore and more of a quick confirmation that everything is ready to run.
Spring Prep Before the First Hot Week
Spring is the most important window for AC maintenance. The work you do before temperatures climb is what separates a smooth summer from an emergency call in July.
Step 1: Replace or Check the Air Filter
Start here every single time. A clogged filter is the most common and most fixable cause of poor AC performance. During the heavy-cooling months, most homes need a new filter every 1 to 2 months.
Check the filter first by holding it up to the light. If you cannot see light through it, replace it. A 1-inch flat filter typically costs $15 to $50. A clogged filter forces the system to work harder, which wears down the blower motor and reduces cooling efficiency.
Step 2: Clear Debris Around the Outdoor Unit
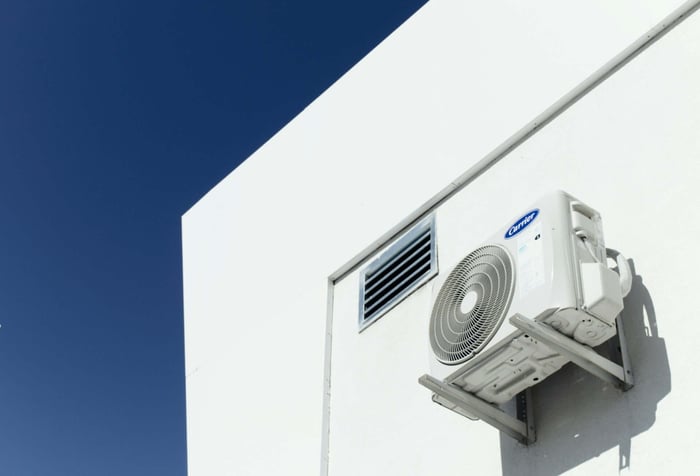
The outdoor condenser needs at least two feet of clear space on all sides. After a winter, you may find leaves, dirt, sticks, and plant growth packed against the unit. Clear it all out before the first run of the season.
Turn off power to the unit at the breaker before you get close. Rinse the fins gently with a garden hose from the inside out to push debris out rather than deeper in. Bent fins can be straightened carefully with a fin comb, available at most hardware stores.
Step 3: Inspect the Condensate Drain
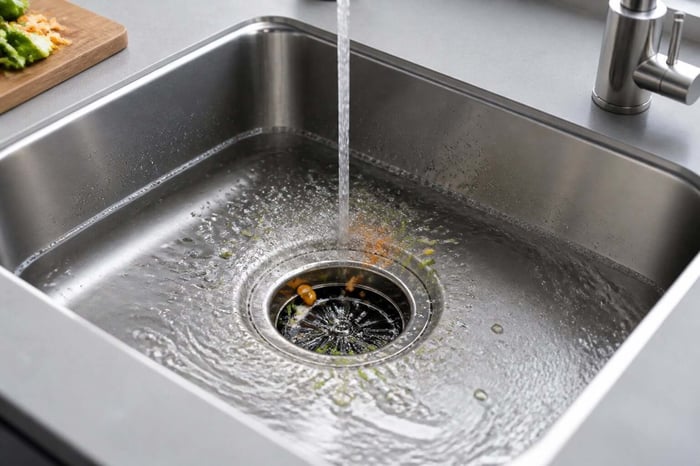
The condensate drain removes humidity that the AC pulls from your air. A clogged drain line causes water to back up inside the unit, which can damage flooring, walls, and the system itself. Look for a white PVC pipe near the indoor air handler; that is the drain line.
Pour a small amount of diluted bleach or vinegar down the line to clear any algae buildup. If water drains slowly or backs up, the line needs to be cleared before you run the system.
Step 4: Schedule a Professional Tune-Up
Some tasks require a licensed HVAC technician. Checking refrigerant levels, testing electrical components, and inspecting the evaporator coil are not DIY jobs. A professional tune-up typically runs $120 to $200 and includes a full inspection of the system's mechanical and electrical parts.
Book this in March or April if possible. Technicians get busy fast once temperatures rise, and you will pay more for emergency service in peak summer than you would for a scheduled spring visit.
Midseason Checks During Heavy Use
Once the AC is running daily, your job shifts from preparation to monitoring. Small changes in performance during the summer often indicate fixable problems before they become expensive ones.
Step 1: Watch for Weak Airflow or Warm Air
Place your hand near a register while the system runs. Airflow should feel strong and noticeably cool. If it feels weak or barely cool, something has changed since spring. The most common causes are a dirty filter (replace it), blocked vents (clear furniture or drapes), or a blower motor issue (call a technician).
Warm air blowing from a system set to cool often indicates a refrigerant problem. That is a job for a licensed technician. Do not add refrigerant yourself.
Step 2: Check Coils for Dirt Buildup
The evaporator coil sits inside the air handler and absorbs heat from your home. The condenser coil sits in the outdoor unit and releases that heat outside. Both collect dirt over time, and dirty coils reduce the system's ability to transfer heat.
You can visually inspect the outdoor condenser coil for debris packed against the fins. The indoor evaporator coil should be cleaned during the annual tune-up. If your system is working harder than usual and the filter is clean, dirty coils are a likely cause.
Step 3: Monitor Thermostat Performance
If the system runs constantly but never reaches the set temperature, the thermostat may be reading inaccurately. Check that the thermostat is not in direct sunlight or near a heat source, both of which can throw off the reading.
Smart thermostats can reveal runtime patterns that show whether the system is cycling normally. Short cycling, where the system turns on and off every few minutes, is a sign of a problem that needs professional attention.
Step 4: Notice Unusual Sounds or Moisture
Grinding, squealing, or banging sounds are not normal. Grinding can point to a failing motor bearing. Squealing often means a worn belt or blower motor issue. Banging may mean a loose part inside the unit. Turn off the system and call a technician if any of these sounds occur.
Moisture around the indoor unit beyond minor condensation is worth noting. A small amount of condensation on the unit itself is expected. Puddles on the floor, wet insulation, or dripping from the air handler are signs the drain line is backed up, or a component is failing.
Fall Shutdown and Off-Season Protection
When cooling season ends, a proper shutdown protects the system through winter and makes spring startup easier. This is also one of the best times to document what happened during the season.
Step 1: Clean the Area Around the Unit
Before you shut down the system, clear away any debris that has collected around the outdoor unit during the summer. Trim back plants or shrubs that grew close. Leaves and organic material left against the unit over winter can trap moisture and accelerate corrosion.
Do one more filter check before switching the system off for the season. If the filter is dirty, replace it now so it is ready for spring rather than forcing a trip to the hardware store during the first warm week.
Step 2: Review Service Notes and Parts Replaced
Fall is the right time to look back at the season. Did the system run a tune-up this year? Was anything replaced? Were there any unusual sounds or service calls? Writing this down now is far more reliable than trying to recall it next spring.
This is where a home record becomes genuinely useful. Storing your AC's service history, the technician's notes, and any parts that were replaced gives you a real picture of the system's condition over time. That record matters when a technician asks what was done last year or when you are deciding whether a repair is worth the cost on an aging unit.
Step 3: Prepare the System for Cold Weather
If your area sees freezing temperatures, turn off the breaker to the outdoor unit to prevent it from running accidentally in cold weather. Running the compressor when temperatures are below 60 degrees can damage it.
A breathable cover can protect the top of the unit from ice and debris, but avoid fully wrapping it in plastic. Plastic traps moisture and invites animals to nest inside. Manufacturer guidance on covering the unit should be your first point of reference.
What to Record After Every Service Visit
The service visit is not over when the technician leaves. What you write down in the next five minutes is what protects your warranty and informs every future decision about the system.
Model and Serial Details to Keep Handy
Your AC's model number and serial number are the two pieces of information every technician will ask for. They are usually printed on a label on the outdoor condenser unit. Write them down and store them somewhere you can find them immediately, not just somewhere you think you will.
The serial number often encodes the manufacture date, which tells you exactly how old the system is. Knowing that number matters when deciding between a repair and a replacement for an aging unit.
Warranty Dates and Maintenance History
Most AC manufacturers require documented annual maintenance to keep the warranty valid. If you cannot prove service was performed, the warranty may not cover a repair that would otherwise be covered. That documentation needs to be accessible somewhere.
Keep the original warranty paperwork along with each year's service invoice. Note the expiration date separately so it does not catch you by surprise. A warranty that expires next spring on a system that needs a compressor is a very different situation than one with three years left.
Date of each service visit
Technician name and company
Tasks performed during the visit
Parts replaced and part numbers if available
Refrigerant type and amount added if applicable
Any issues flagged for follow-up
Repairs That Help With Future Decisions
A repair that cost $300 on a 10-year-old system means something different on a 14-year-old system. When you have a running record of what has been repaired and what those repairs cost, the replace-or-repair decision becomes much clearer. Without that history, you are guessing.
Your records also help the technician. When a new service company visits and can see what was done previously, they spend less time diagnosing and more time solving the actual problem.
Keep the Next Check From Slipping Through the Cracks
The biggest threat to a well-maintained AC is not a broken part. It is a seasonal check that gets postponed and then forgotten entirely.
Build a Simple Seasonal Routine
A two-task rule is enough for most homeowners: check the filter monthly during cooling season and schedule a professional tune-up every spring. Those two habits alone prevent the majority of mid-summer breakdowns.
Tie your reminders to something you already do. Some homeowners change the filter on the first of every month. Others use the start of a new season as their prompt. The method matters less than the consistency.
Season | Key Task | Who Does It |
Early Spring | Replace filter, clear outdoor unit, schedule tune-up | Homeowner + technician |
Late Spring | Professional tune-up, condensate drain check | Licensed technician |
Summer (monthly) | Filter check, monitor airflow and sounds | Homeowner |
Fall | Clean around unit, cover if needed, log service notes | Homeowner |
Frequently Asked Questions
What Should I Check and Clean Each Month to Keep My AC From Losing Airflow?
Check and replace the air filter monthly during cooling season. A clogged filter is the leading cause of reduced airflow and puts extra strain on the blower motor and compressor. Keep vents and registers clear of furniture, curtains, or stored items that block air circulation.
How Often Should the Air Filter Be Replaced, and What Happens if I Keep Putting It Off?
Replace the filter every one to two months when the AC is running regularly. Leaving a dirty filter in place forces the system to work harder, raising energy bills and accelerating wear on key components. Over time, restricted airflow can overheat the system and cause a breakdown.
Which Maintenance Tasks Are Safe to Do Myself, and Which Ones Need a Licensed Technician?
You can safely replace filters, rinse debris off the outdoor condenser fins, clear the condensate drain, and check that vents are unobstructed. Refrigerant handling, electrical component testing, evaporator coil cleaning, and anything involving the compressor require a licensed HVAC technician with the proper tools and certifications.
How Much Does a Typical Tune-Up Cost, and What Work Should That Price Actually Include?
A professional AC tune-up typically runs between $120 and $200. That price should cover a full inspection of electrical connections, refrigerant levels, coil condition, condensate drainage, thermostat calibration, and overall system performance. Ask for a written summary of what was checked and any issues found.
What Are the Signs the Outdoor Unit Needs Attention Before It Quits on the Hottest Day?
Watch for reduced cooling performance indoors, ice forming on the lines near the unit, visible debris packed against the fins, or unusual sounds like rattling or buzzing from the unit itself. These signs often appear weeks before a complete failure, which is why checking the outdoor unit at the start of each season matters.
What Should I Do if I Cannot Find the Owner's Manual but Still Want to Follow the Right Service Steps?
The model number on the outdoor unit label lets you find a digital copy of the manual on the manufacturer's website. You can also use a serial number lookup tool to find manufacture dates and model details by brand. Storing the model and serial number in one place means you will not need to hunt for the label again next time.
Use Manse to Log Tasks and Store AC Records
Add your home to Manse for free and keep all appliances, warranties, and maintenance records in one private place. You can log your AC's model number, serial number, and warranty expiration the first time you set it up, then record each service visit as it happens.
Get reminders when seasonal checks are due so the spring tune-up does not slip past you while you are busy with everything else. Your records stay private, encrypted, and accessible only to you.
Start your home profile today. It is free, it takes a few minutes, and everything you track stays private.