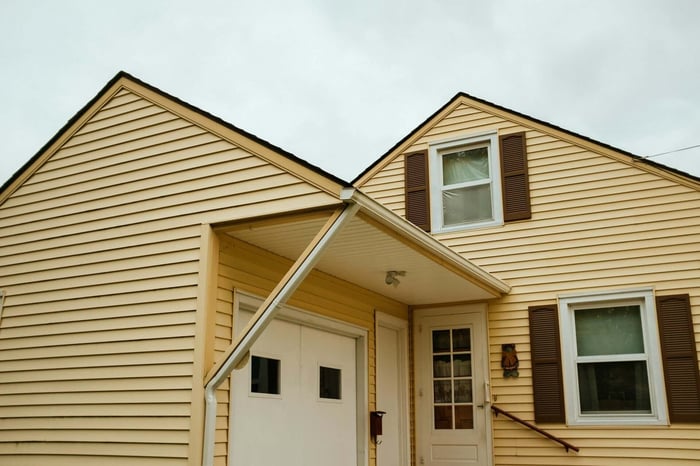

An insurance adjuster is coming to your home, and you are not sure what they will look at, what they want to see, or whether something in your house will cause a problem. That feeling is common. Most homeowners do not find out what inspectors flag until after the report comes back, which is the worst time to learn you had a fixable issue.
Keeping your appliance records, maintenance dates, and repair receipts in one place, the way Manse helps you do, means you can pull that information quickly when you need it. That matters more than most people realize when an inspector is standing in your utility room asking about the age of your water heater.
Keep reading to learn what insurance inspectors look for inside and outside your home, which documents to have ready, how to handle small fixes before the visit, and what to do after the inspection wraps up.
What the Inspector Is Looking For
Insurance inspectors evaluate risk, not cosmetics. Their job is to figure out how likely your home is to generate a claim, and they do that by looking at systems and conditions that cause expensive losses.
Safety Hazards
Safety is the first thing an inspector checks because an injury on your property can cost an insurer far more than a leaky roof. They look for loose handrails on stairs, missing outlet covers, cracked walkways, and smoke detectors that are absent or dead.
Carbon monoxide alarms are required near any combustion appliance, including furnaces, water heaters, and attached garages. If your detectors are more than seven years old, replace them before the visit. Inspectors note the brand and condition, and a missing alarm is one of the easiest findings to avoid.
A trampoline in the backyard or an unfenced pool also shows up as a safety flag. Some carriers surcharge or restrict coverage for these items. If you have either, know your policy's rules before the inspector arrives.
Signs of Damage or Neglect
Peeling paint, water stains on ceilings, rotted wood around window frames, and soft spots in flooring all tell the same story: deferred maintenance. Inspectors treat visible neglect as a signal that other problems may exist below the surface.
A brown ring on a bedroom ceiling is not just cosmetic. It tells an inspector that water got in from somewhere, and they will want to know whether the source was fixed or is still active. Document any past repairs with dates and receipts.
What the inspector sees in one room often shapes how carefully they look at the next one. Walk your home before the visit with fresh eyes and fix what you can.
Major Systems and Their Condition
The four systems that appear on almost every insurance inspection are the roof, electrical panel, plumbing, and HVAC. Together, these four generate the majority of costly claims.
Roof: Inspectors check the age, material, and condition of shingles. A roof over 20 years old draws extra scrutiny.
Electrical panel: Certain older panel brands have documented failure histories. Aluminum branch wiring and undersized service are also flagged.
Plumbing: Inspectors note pipe material, water heater age, and any active leaks or corrosion under sinks.
HVAC: System age and last-known service date matter. A cracked heat exchanger is both a safety and coverage concern.
Knowing the age and service history of each system before the inspector arrives puts you in a stronger position. That information does not always live in one place, which is why it is worth organizing it now.
Exterior Areas to Review First
Inspectors almost always start outside. The exterior gives them an immediate picture of how well the home has been maintained and where the biggest risks sit.
Roof, Gutters, and Drainage
The roof is the single most scrutinized item on an insurance inspection. Carriers pay close attention because roof claims are frequent and expensive, especially in areas with hail or high winds.
Walk around your home and look at the roofline from the ground. Missing shingles, sagging areas, or visible granule loss on asphalt shingles all stand out in photos. If you had a roof replacement, find the date of installation, the permit, and any contractor receipts before the inspector shows up.
Gutters matter more than most homeowners expect. Clogged or detached gutters lead to water running behind siding and pooling at the foundation. Clean them and make sure downspouts direct water at least four feet away from the house.
Siding, Windows, and Doors
Cracked siding, gaps around window frames, and deteriorated caulk are not just cosmetic problems. They let moisture into the wall assembly, which creates rot and mold risk that an insurer takes seriously.
Press lightly on wood siding and trim, especially on north-facing walls and areas without roof overhang protection. Soft spots mean rot is already present. Replacing a small section of trim before the inspection costs far less than a finding that triggers a repair requirement.
Windows and exterior doors should close and latch fully. A door that does not seal properly is both a security and a weather exposure concern. Check the weatherstripping and replace it if it is cracked or missing.
Walkways, Stairs, and Railings
Trip-and-fall hazards are a liability category that inspectors document carefully. A cracked concrete step, a wobbly porch railing, or a lifted section of sidewalk can all appear in the inspection report.
Test every railing on your property by pressing against it firmly. If it moves more than an inch, it needs to be secured before the visit. Concrete cracks that create lips more than a quarter inch high are worth patching with hydraulic cement or calling a contractor.
Inspectors photograph what they find, and a photo of a cracked front step goes straight into a risk assessment that affects your premium. Fixing these issues before the visit is almost always faster and cheaper than addressing them afterward under a coverage condition.
Interior Items That Often Raise Questions
The interior inspection focuses on the systems and conditions most likely to cause water damage, fire, or injury inside the home. These are the areas where inspectors spend the most time asking questions.
Plumbing Leaks and Water Stains
Any sign of active moisture triggers more questions. Inspectors check under kitchen and bathroom sinks, around toilets, and at the base of the water heater for soft flooring, rust, or active drips.
A water heater over 10 to 12 years old is a common finding. The pressure relief valve on the side of the tank should have a pipe running to the floor and show no corrosion. If it is leaking or the valve looks crusted with mineral buildup, that is worth addressing before the inspection.
Water stains on drywall or ceilings prompt inspectors to look harder at the entire area. Even a stain from a leak that was repaired two years ago can raise questions about whether the source was fully resolved.
Electrical Panels and Wiring Issues
The electrical panel is one of the most consequential items on an insurance inspection. Certain brands, including older Federal Pacific and Zinsco panels, have documented failure histories that cause many carriers to require replacement before binding coverage.
Open your panel box and look for any signs of scorching, melting around breakers, or double-tapped circuits, which is when two wires share a single breaker slot. These are findings inspectors photograph and flag. If you have had electrical work done, receipts and permit records showing the scope of that work can support your case.
Aluminum branch wiring, common in homes built between the mid-1960s and mid-1970s, is another flag. It does not automatically disqualify a home, but it usually prompts additional scrutiny or requirements for arc-fault breakers.
Heating, Cooling, and Ventilation
An aging HVAC system does not just wear out; it creates secondary risks. A failing condensate drain line can leak into walls. A cracked heat exchanger on a furnace allows combustion gases into living space.
Pull out your furnace filter before the inspection. A clogged filter signals neglect to an inspector and indicates the system is working harder than it should. Replace it, and note when the system was last serviced professionally. Annual service records help here.
Inspectors also check that exhaust vents for the furnace and water heater route properly to the exterior. Disconnected or improperly pitched vent pipes are both safety and coverage concerns. If you are unsure, a quick visual trace of the vent path from the appliance to where it exits the home takes about five minutes.
Documents to Gather Before the Visit
Having your records organized before the inspector arrives is one of the most practical things you can do. It demonstrates maintenance history and can directly offset concerns about system age.
Repair and Maintenance Records
Gather receipts, invoices, and contractor notes for any major work done in the past five to ten years. This includes roof repairs or replacement, re-piping, panel upgrades, HVAC servicing, and foundation work.
Permits matter. A permitted roof replacement or electrical upgrade is worth more to an insurer than an undocumented one because it shows the work was done to code and inspected. If you pulled permits, contact your local building department to get copies if you no longer have them.
Organize these by system and date. A simple folder with labeled sections for roof, electrical, plumbing, and HVAC is enough.
Appliance and System Details
Know the approximate age and model of your major systems before the inspector asks. This includes the furnace, central air unit, water heater, and electrical panel. If you have the original manuals or installation dates, even better.
Water heater: Check the serial number. Most manufacturers encode the manufacture date in the first few digits. A water heater from 2011 is 15 years old in 2026, which puts it past the expected lifespan for many tank units.
HVAC: Look for a metal data plate on the unit. It lists the model and serial number, which often encode the manufacture year.
Electrical panel: Note the brand and amperage. This is printed on the inside door of the panel.
Tracking this information in one place, rather than trying to recall it under pressure, is exactly what a home record system is designed to handle.
Photos of Updates and Improvements
If you replaced the roof, renovated the bathroom, or upgraded the windows in the past several years, have photos showing the finished condition. Dated photos from a phone are acceptable and give the inspector supporting context for your records.
Before-and-after photos of a repaired wall, a new water heater installation, or a deck rebuild show the scope of work and the current condition. Time-stamped photos carry weight when the inspector notes, for example, "roof appears relatively new."
Strong documentation does not just protect your premium. It also supports your coverage limits by demonstrating what your home is actually worth.
Simple Fixes That Can Help You Prepare
You do not need to renovate your home before an inspection. But a few hours of focused attention can prevent findings that delay coverage or raise your premium.
Basic Cleanup and Access
Clear the path to your electrical panel, water heater, furnace, and attic access hatch. Inspectors need to see and photograph these areas, and boxes stacked in front of a panel or a furnace room used for storage send a signal before they even look at the equipment.
Replace any burned-out bulbs in rooms the inspector will walk through. A dark basement or utility room limits visibility and makes conditions look worse than they may be. Test your smoke detectors by pressing the test button, and replace batteries in any unit that does not respond immediately.
This sounds basic, but clean, accessible spaces read as maintained homes to inspectors.
Small Repairs Worth Doing Now
Re-caulk around the bathtub, shower, and kitchen sink if the existing caulk is cracked or pulling away from the surface.
Tighten any loose outlet cover plates and replace cracked ones.
Secure a wobbly toilet by tightening the bolts at the base, and check that the supply line valve is not weeping.
Replace a furnace filter that has not been changed in the past few months.
Fix a dripping faucet or running toilet; both signal maintenance gaps.
These small fixes cost very little and collectively present a home that has been looked after. An inspector's report reflects what they observe, and a well-maintained appearance supports a clean finding.
Issues to Disclose Instead of Hiding
Do not paint over water stains, cover soft flooring with a rug, or conceal an electrical problem behind a panel cover. Inspectors are trained to find hidden damage, and concealing it can void your coverage if a claim is later connected to that issue.
If your basement had a flooding event three years ago and you had it professionally mitigated, say so and show the remediation report. A disclosed and remediated problem is almost always handled better than a concealed one that comes out later.
Honesty with documentation is the strongest position you can be in.
What to Do After the Inspection
The inspection ending is not the end of the process. What happens next depends on what the inspector found and how you respond to it.
Reviewing the Inspector's Findings
The inspector's report goes to your carrier, not directly to you in most cases. Contact your agent to request a copy of the findings. You have the right to understand what was noted and why, and knowing the specific language in the report helps you respond effectively.
Some findings are informational. Others are conditions, meaning your carrier requires them to be addressed within a set window, often 30 to 60 days, or your coverage is amended or canceled. Know which category each finding falls into before you respond.
Read the report carefully and flag anything you disagree with or believe was already addressed.
Prioritizing Repairs and Follow-Up
Address conditions first. If the carrier requires a repair, confirm the deadline and get a licensed contractor scheduled immediately. Waiting until the last week of a 30-day window leaves no room for delays.
For informational findings that are not required but may affect your premium, get quotes and decide whether the cost of the repair is offset by the premium savings. A roof replacement that brings your premium down by $300 a year pays for itself over time.
Keep all receipts from post-inspection repairs and send copies to your agent. Document every step with photos and a clear date.
Frequently Asked Questions
How do you get your home ready before the insurance inspector shows up?
Start by walking the exterior and interior with the inspector's perspective in mind: look for trip hazards, clear access to your panel and HVAC, and test every smoke detector. Gather repair receipts, roof records, and system ages so you can answer questions on the spot without searching through drawers.
Do insurance inspectors come inside your home, or do they only look at the outside?
Most insurance inspections include both the exterior and interior, with inspectors checking the electrical panel, water heater, HVAC system, and any visible signs of water damage inside. Some carriers order exterior-only inspections for policy renewals, but new policy inspections are typically more thorough and include interior access.
What problems most often cause an insurance inspection to fail or trigger repairs?
The most common triggers are an aging or damaged roof, an outdated or flagged electrical panel brand, active plumbing leaks, and missing smoke or carbon monoxide detectors. A water heater past its expected lifespan and signs of deferred maintenance like water stains or deteriorated siding also appear frequently in findings that require follow-up.
Can you refuse an insurance inspection, and what happens to your coverage if you do?
You can decline, but refusing an inspection typically gives the carrier grounds to cancel or non-renew your policy. Most carriers include an inspection clause in their policy terms, so refusing is rarely a neutral outcome and almost never works in your favor.
What should you avoid saying to the inspector so you don't create extra issues for your policy?
Avoid speculating about problems you are not certain exist, such as guessing that your roof "might" have storm damage when you have no evidence of it. Stick to facts you can document. Do not downplay known issues either, since concealment discovered during a future claim can affect your coverage.
What items do insurance companies focus on most during an inspection of your home?
The roof is the most scrutinized item, followed by the electrical panel, plumbing system, and HVAC. Insurers also focus on liability hazards like unfenced pools, deteriorated walkways, and safety devices including smoke and carbon monoxide alarms. These items together account for the majority of expensive claims that carriers work to assess and price accurately.
Keeping Your Home Records Organized
The biggest lesson most homeowners take from an insurance inspection is that they did not know where anything was. The water heater age, the panel brand, the roof replacement date: all of it matters, and none of it was easy to find.
Add your home to Manse for free and start tracking every appliance, warranty, and maintenance reminder in one private place. Your records stay encrypted and private, accessible when you need them, not buried in a drawer or scattered across three email inboxes.
If you just realized your records are scattered across drawers and inboxes, Manse is where that stops. Build your home profile in minutes: no credit card, no noise, just your home organized.