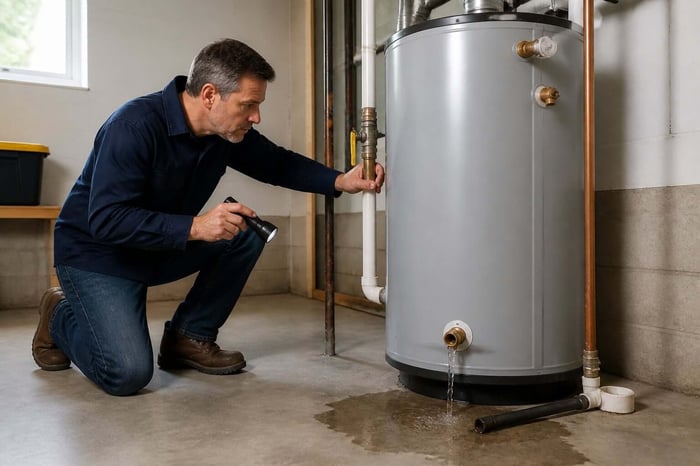

You notice a puddle forming around the base of your water heater. Maybe it showed up overnight, or you spotted it while doing laundry. Either way, your first instinct is probably to figure out how serious it is before you do anything else.
A leaking water heater can cause real water damage fast, but not every leak means the unit is done. Some are minor fixes. Others mean replacement is the only sensible path. Knowing which situation you are in makes all the difference.
That is also where a tool like Manse helps, because having your appliance records and purchase date in one private place means you are not guessing about age or warranty coverage when a plumber shows up.
Keep reading to learn how to respond safely in the first few minutes, how to identify where the leak is actually coming from, when a repair makes sense versus a full replacement, and what maintenance habits will protect your home going forward.
What to Do in the First Few Minutes
The first ten minutes after you spot a leak matter more than most homeowners realize. Water near electrical components or gas lines creates risk quickly, so your priority is to make the area safe before you investigate.
Shut Off Power or Gas Safely
For an electric water heater, go straight to your breaker panel and switch off the circuit labeled for it. For a gas unit, find the gas control knob on the heater itself and turn it to the "pilot" or "off" position. Do not skip this step even if the leak looks minor.
If you smell gas at any point, leave the house and call your gas utility from outside. That situation moves beyond a plumbing call.
Stop the Water Supply
The cold-water shutoff valve is on the pipe entering the top of the tank. Turn it clockwise to close it. If the valve is stuck or you cannot reach it safely, go to your home's main water shutoff instead.
One exception worth noting: if the leak is very slow and you are still trying to pinpoint the source, briefly leaving the water on can make the location easier to spot. Once you know where it is coming from, close the valve immediately.
Protect Flooring and Nearby Belongings
Lay down old towels or place buckets under the tank right away. If the heater is in a finished basement or laundry room with hardwood or laminate flooring, water sitting for even thirty minutes can cause warping.
Move any boxes, cleaning supplies, or stored items away from the area. This matters both for protecting your belongings and for giving yourself clear access to inspect the unit. Once the area is safe and dry, you are ready to figure out exactly where the water is coming from.
How to Tell Where the Leak Is Coming From
Pinpointing the source of the leak is what separates a quick fix from an expensive mistake. Water can travel before it drips, so where you see the puddle is not always where the problem started.
Condensation vs. an Actual Tank Leak
Before assuming the worst, wipe the outside of the tank completely dry and watch for thirty minutes. If moisture returns evenly across the surface, you are likely seeing condensation, which is common in humid months or when a unit cycles through cold water in a warm room.
If water comes back as a distinct drip or runs down from a specific point, that is a real leak. Condensation evaporates; a leak does not.
Loose Valves and Pipe Connections
Check the fittings on top of the tank first. The cold water inlet and hot water outlet pipes can loosen over time, especially in older homes where the pipes shift seasonally. Run your fingers around the connections while the water is still off and feel for moisture.
Also check the temperature and pressure relief valve, usually located on the side of the tank with a small lever and a discharge pipe running downward. Moisture at the threaded connection where it meets the tank is a sign the valve or its fitting needs attention.
Drain Valve and Temperature Relief Issues
The drain valve sits near the bottom of the tank and is used during flushing. It is a common leak point because the plastic or brass valve can wear out or sit slightly open. Feel around the base of the valve and check the threads for dripping.
Here is a useful checklist for your inspection:
Fittings at the top of the tank (inlet and outlet connections)
T&P valve threads and discharge pipe
Drain valve body and threads
Any seam along the bottom of the tank
Floor beneath the tank for rust staining that suggests an older, slow leak
If the leak is isolated to a valve or fitting, repair is usually straightforward. If you find water coming from the tank body or the base seam, that changes the conversation entirely.
Read more: How to Create a Home Maintenance Checklist when Tasks Keep Piling Up?
When a Quick Fix Might Work
Some water heater leaks respond well to a basic repair, and you do not always need to call someone right away. The key is being honest about what you are actually dealing with.
Tightening a Fitting
Loose pipe fittings at the top of the tank are among the most common and easiest-to-fix sources of leaks. Use an adjustable wrench to snug up the connection, working slowly to avoid over-tightening, which can crack older fittings. A quarter turn is often all it takes.
Do not use pipe tape or sealant on a fitting that simply needs tightening. Adding material without addressing the actual looseness will not hold.
Replacing a Faulty Valve
A worn drain valve that continues to drip after you close it fully needs to be replaced. Turn off the water supply, drain the tank by attaching a garden hose to the valve, then remove the old valve with a pipe wrench. Wrap the threads of the new valve in PTFE tape, coat with joint compound, and thread it in by hand before tightening with the wrench.
A T&P valve that leaks continuously or fails to reset after testing should be replaced by a licensed plumber. The part itself runs around $30 to $60, and professional replacement typically lands around $100 to $150 total.
Clearing Sediment and Testing Pressure
High water pressure is a frequent cause of repeated T&P valve leaks. Residential water pressure should sit between 50 and 60 psi. If yours runs higher, the valve is doing exactly what it is designed to do by releasing excess pressure, but the real fix is a pressure regulator adjustment.
Sediment buildup at the bottom of the tank can also cause pressure fluctuations and strange popping sounds during heating cycles. Flushing the tank once a year by attaching a garden hose to the drain valve and running water until it runs clear is a straightforward way to address this. If the repairs above did not stop the leak, the problem likely goes deeper than any fitting or valve.
Signs the Tank Itself Has Failed
When the leak is coming from the tank body rather than a valve or fitting, repair is rarely the right answer. Here is how to confirm you are dealing with tank failure.
Rust, Corrosion, and Hairline Cracks
Orange or reddish discoloration on the outside of the tank near the base or along the seams points to corrosion working from the inside out. You might also notice rust-tinted water coming from your hot taps, which is a sign the interior lining has broken down.
Hairline cracks in the tank body are not visible to the naked eye in most cases, but water seeping from the lower seam without any other source is a reliable indicator. There is no patch that holds long-term on a cracked steel tank.
Pooled Water Around the Base
Water sitting directly under the tank with no drip trail leading back to a valve or fitting almost always means the tank is leaking from the bottom. This is different from a valve drip, which leaves a clear path.
If you dried the area and the puddle reforms within a few hours with no identifiable fitting source, treat this as a failed tank. Continuing to run the unit risks a much larger water release.
Age and Warranty Clues
Most conventional tank water heaters carry a 6- to 12-year manufacturer's warranty and have a realistic lifespan of 8 to 12 years. If your unit is past the 10-year mark and showing any of the signs above, the cost calculation almost always favors replacement over repair.
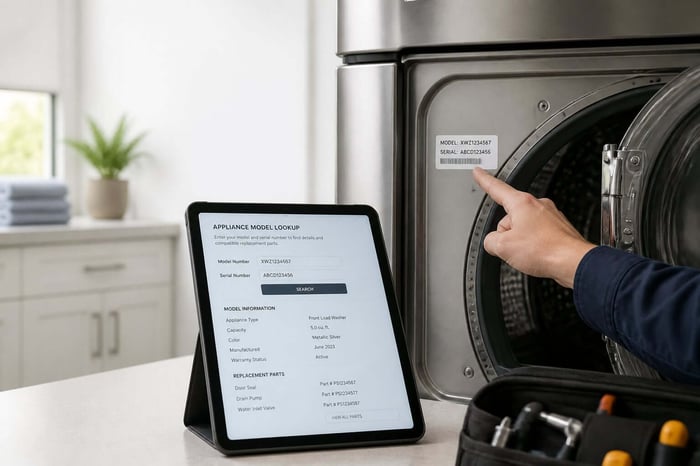
The manufacture date is encoded in the unit's serial number. Most brands use the first two characters to indicate the year or month and year of production. If you do not know your unit's age, check the serial number against the manufacturer's decoding guide online.
Knowing your heater's age before you call a plumber puts you in a much better position when the conversation turns to repair versus replace.
Repair vs. Replacement Costs for Homeowners
The financial decision here is straightforward once you know the unit's age and the nature of the leak.
When Repair Makes Financial Sense
Repairs make sense when the unit is less than seven years old, and the problem is isolated to a component rather than the tank itself. Replacing a T&P valve, tightening or swapping a drain valve, or adjusting water pressure typically costs between $100 and $350 total, including labor.
If the repair cost is under 30 percent of what a new unit would cost and the heater has several years of life left, fixing it is reasonable.
When Replacement Prevents Bigger Damage
If the tank is corroded, cracked, or more than 10 years old, replacing it is the more financially sound choice in almost every case. A new traditional tank water heater installed professionally runs between $900 and $2,500 depending on size, fuel type, and location.
Continuing to repair an aging unit compounds risk. One failed tank can release 40 to 80 gallons of water into your home in minutes, which easily leads to flooring replacement, drywall damage, and mold remediation costs that far exceed the price of a new heater.
Questions to Ask Before Hiring a Pro
Getting the right plumber matters as much as the decision itself. Before you book anyone, have answers to these questions ready:
How old is your water heater and what is the model number?
Is the leak coming from a component or from the tank body?
Do you have an active warranty on the unit or the parts?
What permits are required in your area for replacement?
Does the quote include disposal of the old unit?
A plumber who cannot give you a written estimate covering parts and labor is worth a second opinion. Once you know what the job costs, you can also figure out the best path to avoid this situation from repeating.
How to Prevent Another Water Heater Leak
Most water heater problems do not appear without warning. They develop slowly through sediment buildup, valve wear, and pressure stress, all of which respond well to regular maintenance.
Routine Maintenance That Matters
Set a schedule and stick to it. Annual flushing removes sediment that builds up at the bottom of the tank and shortens the unit's lifespan. Every six months, test the T&P valve by briefly lifting the lever until water flows and then releasing it. If it does not snap back or continues dripping, replace it.
Check the anode rod every two to three years. This is a magnesium or aluminum rod inside the tank that sacrifices itself to corrosion so the tank lining does not corrode first. When it wears down to the core wire, the tank becomes vulnerable. Replacing it typically costs $20 to $50 for the part and extends tank life significantly.
Records to Keep for Future Repairs
Every time you service your water heater, note the date, what was done, and who did the work. Keep the original installation paperwork, warranty documentation, and the model and serial numbers in one place.
If you ever file a warranty claim, sell your home, or need to talk a plumber through what has already been done, having those records saves time and prevents duplicate work. Homeowners who cannot locate this information often end up paying for inspections and diagnostics that would not be necessary otherwise.
Frequently Asked Questions
Is a Leaking Water Heater Dangerous for You or Your Home?
Yes, it can be. Water near electrical components or a gas line creates fire and shock risk. Even a slow leak left unaddressed can lead to mold growth within 24 to 48 hours. Treat any water heater leak as something that needs attention the same day you find it.
What Usually Causes Water to Show Up Under Your Water Heater?
The most common culprits are a worn drain valve, a leaking T&P valve, loose pipe fittings at the top of the tank, or corrosion of the tank itself. Condensation can also pool beneath the unit during humid months, though it typically evaporates without leaving rust staining.
How Can You Tell if the Leak Is Coming from the Tank or a Fitting?
Dry the area completely and watch where moisture returns. If water trails back to a valve, connection, or pipe, the source is a component. If water appears along the seam at the base of the tank and there is no traceable path to a fitting, the tank itself is the source.
Can You Keep Using Your Hot Water if the Unit Is Leaking?
It depends on the leak source. A minor drip from a loose fitting at the top of the tank may allow brief continued use while you arrange a repair. A leak from the tank body or any situation involving the T&P valve should prompt you to shut down the unit until it is assessed. Running a failing unit risks a larger water release.
How Long Can Your Water Heater Keep Running After It Starts Leaking?
There is no reliable timeline; it varies widely depending on the cause. A hairline crack in an aging tank can become a full rupture within hours or hold for days. It is not worth guessing. Shut the unit off, find the source, and make a decision based on what you find rather than hoping it holds.
When Does a Leak Mean You Should Replace the Water Heater Instead of Repairing It?
Replacement makes more sense than repair when the tank itself is leaking, the unit is over 10 years old, or the repair cost approaches half the price of a new installation. Corrosion on the tank exterior and rust-colored hot water are reliable signs that the interior has degraded beyond what any repair can address.
Stop Chasing the Same Problems Twice
A water heater leak is stressful in the moment, but it is also a useful reminder that appliances need attention before they fail. The homeowners who handle these situations calmly are usually the ones who already know their unit's age, have the model number handy, and can tell a plumber exactly what service the heater has received.
If this leak caught you off guard, that is a good signal to get your home's records in order now rather than waiting for the next appliance to give you trouble.
Manse is free to start. Add your home in minutes and stop losing track of the details that matter. Your water heater's install date, warranty, and service history belong somewhere you can actually find them when it counts.