
Walking into closing without a clear picture of the plumbing is one of the most expensive mistakes buyers make in older homes. Once the deed is in your name, every repair bill is yours too.
Keeping a record of what the inspector found, what was repaired before closing, and what the water heater's manufacture date is—all of that becomes part of your home's story. Manse gives you a private place to store those details so you can find them when you need them.
Keep reading to learn exactly what a thorough plumbing inspection covers, which fixtures reveal hidden trouble, how to read water heater warning signs, where slow leaks hide, and what your inspector's report should include before you negotiate repairs or walk away.
What a Plumbing Inspection Should Cover
A complete plumbing inspection looks at every part of the system that moves water into, through, and out of the home. That includes supply lines, drain lines, vent stacks, fixtures, the water heater, and the sewer connection.
Supply Lines and Shutoff Valves
Start with the material of the supply lines. Homes built before 1980 often have galvanized steel pipes, which corrode from the inside out. You may not notice the problem until water pressure drops noticeably at a second-floor shower while the kitchen faucet runs fine below. Copper and PEX are better long-term materials, and spotting galvanized early gives you real negotiating leverage.
Every shutoff valve in the home needs to open and close without leaking. A valve that has not moved in fifteen years can fail the moment a plumber turns it. The main shutoff valve at the meter is especially important. If it sticks or leaks during the inspection, budget for a replacement before you move in.
Check the pressure regulator if the home has one. Normal residential water pressure should fall between 40 and 80 psi. Pressure over 80 psi stresses every fixture and connection in the house, shortening their lifespans.
Drain, Waste, and Vent Performance
Run water through every drain in the home during the inspection and time how quickly it clears. A sink that drains slowly may have a simple clog, but it can also indicate a partially collapsed drain line or a venting problem that keeps recurring.
Vent pipes allow sewer gases to escape through the roof and let air into the drain system so water flows freely. If you hear gurgling sounds in a toilet when a nearby sink drains, that is a textbook vent-blockage symptom. It often means the vent stack is clogged with debris or was never properly installed.
Older homes sometimes have cast iron drain pipes with joints that have deteriorated over decades. Visible sagging in exposed basement drain lines is a sign that sections may need replacement sooner rather than later. Knowing this before closing lets you plan the cost accurately.
From here, the fixtures throughout the house add another layer of detail that the supply and drain lines alone cannot show.
Read more: What Do Home Inspectors Look For?: Common Problems Every Buyer Should Know
Fixtures That Reveal Hidden Trouble
Fixtures are where system problems become visible. A leaking faucet base or a toilet that rocks on its flange can indicate damage that extends well beyond the fixture itself.
Faucets, Sinks, and Toilets
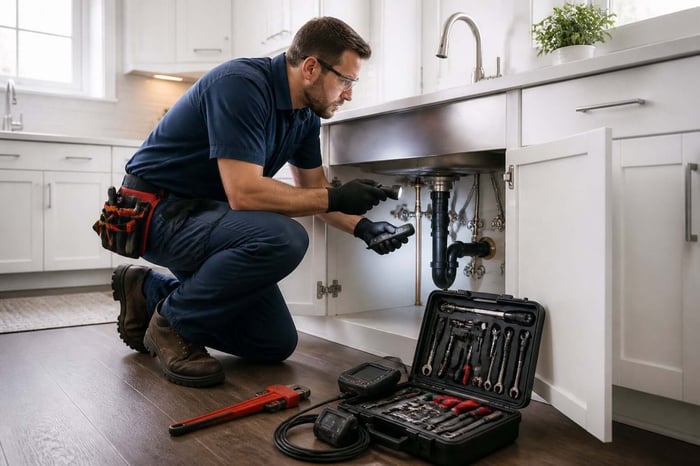
Check under every sink cabinet during the walkthrough. Water stains on the cabinet floor, soft particleboard, or a mildew smell all indicate a slow leak that has been dripping long enough to do real damage to the cabinet and the subfloor beneath it. A stain that looks dry does not mean the leak has stopped.
Test every toilet by flushing and watching the tank refill. A toilet that runs continuously is wasting water and often has a failing flapper, but a toilet that rocks slightly when you push on it is a bigger concern. Rocking means the wax seal at the floor flange is compromised, and water may have been seeping into the subfloor with every flush.
Check faucet handles for mineral buildup around the base. Heavy calcium deposits suggest hard water has been sitting at that connection for a long time, which can indicate poor drainage or a fitting that has been weeping for years.
Tubs, Showers, and Laundry Connections
Press on the tile grout and the wall surface around a tub or shower surround. Soft or spongy drywall behind tile almost always means water has been getting through the grout for an extended period. Re-tiling is a surface fix. Replacing water-damaged drywall and subfloor is a much larger job.
Check the laundry area for the washing machine supply valves. These are often left under pressure for years without being touched. Look for corrosion at the valve body and at the hose connections. A braided stainless hose in good condition is preferable to an old rubber hose, which can burst without warning.
Look at the floor around the base of the laundry area for soft spots or staining that would suggest a drain has been overflowing or a supply connection has been leaking slowly. These areas are easy to overlook during a quick walkthrough, but they carry real repair-cost potential.
Understanding what fixtures reveal on the surface prepares you for the next critical system: the water heater, which is often the most expensive single plumbing item to replace.
Water Heater and Pressure Warning Signs
The water heater tells you a lot about how well the previous owners maintained the home's plumbing. Its age, condition, and behavior during the inspection all matter.
Tank Condition and Age Clues
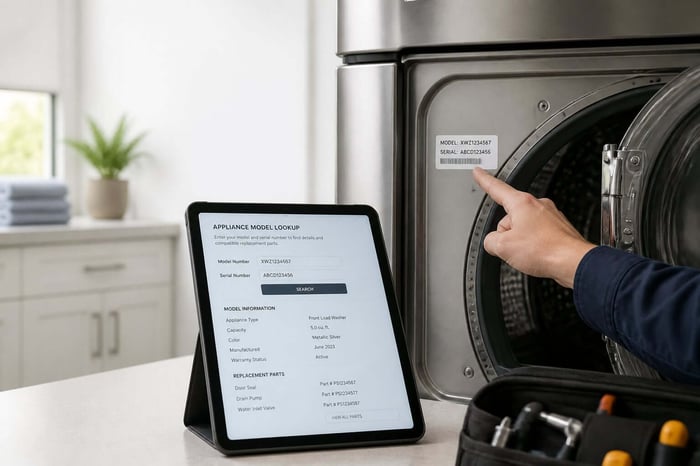
Find the manufacture date on the sticker attached to the tank. The first four digits of the serial number on most major brands encode the year and week of manufacture, though the format varies by manufacturer. Most tank water heaters last 8 to 12 years. If the unit is already 10 years old, budget for a replacement within the next few years regardless of how it looks externally.
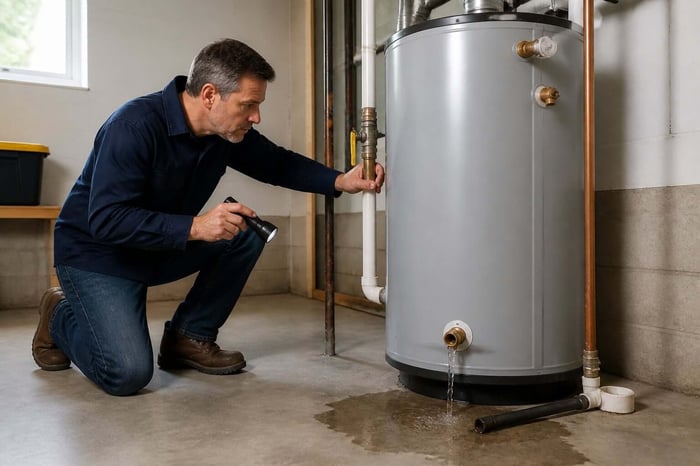
Look at the base of the tank for rust staining or mineral deposits. Either can signal that the temperature and pressure relief valve has discharged at some point, or that the tank itself is beginning to corrode from the inside. A rusty base is a sign the tank is near the end of its useful life.
Check the flue pipe on gas water heaters. It should be properly connected, sloped upward toward the vent, and free from gaps or rust. A disconnected or deteriorated flue is a carbon monoxide risk and a code violation.
Pressure, Temperature, and Flow Issues
Ask the inspector to run hot water at multiple fixtures simultaneously and note how long it takes to arrive and how consistent the flow is. Weak hot water pressure at a second-floor fixture, while cold pressure is fine, often points to a failing or scaled-up hot water line rather than a fixture problem.
The temperature and pressure relief valve on the tank should have a discharge pipe extending within 6 inches of the floor. If that pipe is missing or directed into a bucket, it is a code issue that must be corrected. This valve is a critical safety device, not a cosmetic detail.
Water that arrives discolored or with a metallic smell from the hot side only often means the tank's anode rod is depleted and the tank interior is corroding. This is a sign the heater has not been serviced and may be close to failure.
With the water heater evaluated, you are ready to look at the parts of the home where leaks hide long before they become visible.
Leak Detection Around Walls, Floors, and Ceilings
Hidden leaks cause more structural damage in older homes than almost any other plumbing problem. They are also the easiest to miss on a quick walkthrough.
Moisture Stains and Soft Materials
Look at ceilings directly below bathrooms on upper floors. A yellowish ring stain or a paint bubble almost always means a toilet wax seal or a drain connection above has been leaking. The ceiling stain you see is usually just the edge of a larger wet area above it.
Press lightly on the flooring around the base of toilets, tubs, and under-sink cabinets. Soft vinyl or a springy feel underfoot suggests the subfloor has been wet long enough to lose structural integrity. Replacing a subfloor section is a multi-day repair job and adds high cost to any budget.
Check closets and storage areas on exterior walls for mold spots near the floor. Older homes often have supply lines running through exterior wall cavities, and even minor condensation or a pinhole leak can feed mold growth for months before it becomes visible.
Meter Checks and Slow Leak Indicators
A simple water meter test can reveal a hidden leak in under 30 minutes. Turn off every water-using appliance and fixture in the home, then watch the meter. If the meter dial continues to move, water is actively flowing somewhere in the system. This test costs nothing and can catch a slow leak that no visual inspection would find.
Look at the meter itself for recent usage that seems unusually high. Some meters display a leak indicator light or a small triangle that spins when flow is detected. This is one of the most reliable field tools available during a pre-purchase walkthrough.
Mold smell without visible mold is another key signal. If a bathroom or utility room smells musty even when the ventilation fan is running, a pipe inside the wall may be slowly weeping. Trust the smell.
Sewer and Drain Concerns That Change Repair Costs
Sewer line problems are among the most expensive surprises a buyer can face after closing. They are also largely invisible without specialized equipment.
Main Line Blockage Risks
The main sewer line in an older home runs from the foundation to the municipal connection or septic tank. In homes built before 1980, the line is often cast iron or clay tile. Both materials are susceptible to cracking, root intrusion, and joint separation over time. A main line that has tree roots growing through it may still drain adequately during a short walkthrough but will fail under normal daily use.
Signs of a compromised main line include:
Slow drains throughout the home, not just in one area
Sewage smells in the basement or near floor drains
Water backing up in a basement floor drain when an upstairs toilet is flushed
Gurgling sounds from multiple fixtures at once
Soft or sunken spots in the yard above the sewer path
Any of these symptoms warrants a camera inspection before closing.
When a Camera Scope Makes Sense
A sewer camera scope runs a flexible camera through the main line from the cleanout access point to the street connection. It takes about an hour and typically costs between $150 and $400. For any home built before 1985, that cost is a very small amount relative to the potential repair bill.
Camera scopes can reveal root intrusion, offset joints, collapsed sections, and the overall condition of the pipe. If the inspector finds an offset joint or a section with active root infiltration, the repair can range from a spot repair under $1,000 to a full line replacement exceeding $10,000, depending on depth and access.
Ask the inspector whether they recommend a scope based on the home's age and the drainage behavior they observed during the walkthrough. Most experienced inspectors will flag this if they see any of the warning signs listed above.
Knowing what is in the ground beneath the yard gives you the last piece of the picture. Now you need to make sure that information is captured and usable.
How to Document Findings and Plan Next Steps
The value of an inspection depends entirely on what you do with the findings. A thorough report you cannot interpret or act on is not useful.
Questions to Ask the Inspector
Before the inspector leaves, ask specific questions rather than waiting to read the report alone. Good questions to ask include:
Which findings are safety issues versus cosmetic problems?
What is the estimated lifespan of the water heater based on what you observed?
Did you see any evidence of past repairs that may indicate recurring problems?
Would you recommend a camera scope of the main sewer line?
Are any of the pipe materials here something I should plan to replace in the next five years?
Ask the inspector to point out every item they noted while you are still on-site. Reading a report description of "moisture at base of toilet in main bathroom" is much less informative than standing there and seeing the soft flooring yourself.
Repair Priorities for Budgeting and Negotiation
Not every plumbing finding is equal. Organize the inspector's notes into three groups before you enter negotiations:
Immediate safety concerns: disconnected flue pipes, failed shutoff valves, active leaks inside walls
Near-term repairs: aging water heater, slow drains with vent issues, corroded supply lines
Monitor and plan: old pipe materials in good condition, minor mineral buildup at fixtures
Focus your repair requests on the immediate safety concerns and the near-term items with clear cost estimates. Sellers are more likely to negotiate on items with documented costs than on vague concerns about aging materials.
Keep a copy of the inspection report and all repair receipts in one place. When you need a plumber two years from now, knowing what was already fixed and what was flagged as an upcoming need saves you time and avoids repeating work.
Frequently Asked Questions
What should you check first when you're trying to spot a hidden leak before it ruins your drywall?
Start with the water meter test: turn off every fixture and appliance, then watch the meter for movement. If it is still spinning, water is flowing somewhere it should not be. Follow up by pressing on walls, floors, and ceilings near plumbing lines for soft spots or staining.
What's typically included in a pro's inspection of your home's plumbing, from fixtures to main lines?
A licensed plumber or home inspector will check supply lines, shutoff valves, water pressure, all fixtures and drains, the water heater, the vent stack's function, and the visible condition of pipes throughout the home. They may also recommend a sewer camera inspection if the home is older or shows signs of drainage issues.
Which rough-in items should you verify before walls close up, so you don't get stuck reopening them later?
Before drywall goes up in any renovation, confirm that drain lines have the correct slope of about one-quarter inch per foot, vent connections are properly tied in, supply line materials meet local code, and all shutoff valves are accessible at their final locations.
What are the most common plumbing code issues that trigger a failed inspection, and how can you avoid them?
Common failures include missing or improperly installed vent pipes, temperature and pressure relief valves without discharge piping, supply lines without shutoff access, and mixed pipe materials joined without proper fittings. A licensed plumber can identify these before a formal inspection.
What should you look at on drains, vents, and cleanouts to prevent slow sinks and surprise backups?
Check that every drain runs freely with no gurgling after water clears, that cleanout caps are present and accessible, and that vent pipes on the roof are not clogged with debris or bird nests. A gurgling drain during normal use almost always indicates a vent problem.
What details should your plumbing inspection notes and report include to keep your records useful and under your control?
Your report should include the identified pipe materials, water pressure reading in psi, water heater age and condition, any active leaks or moisture noted with their locations, and the inspector's recommendations ranked by urgency. Store this alongside your purchase documents so future plumbers and contractors can reference the home's history.
Put Your Inspection Records Where You Can Actually Find Them
Buying an older home means inheriting decades of plumbing decisions you did not make. A good inspection gives you the information to protect yourself, but only if you can find that information when something goes wrong two years from now.
Add your home to Manse for free and keep all appliance records, warranties, and maintenance reminders in one private place. Your inspection report, water heater age, pipe material notes, and repair receipts all belong in one organized spot that you control, not scattered across email threads and filing folders.