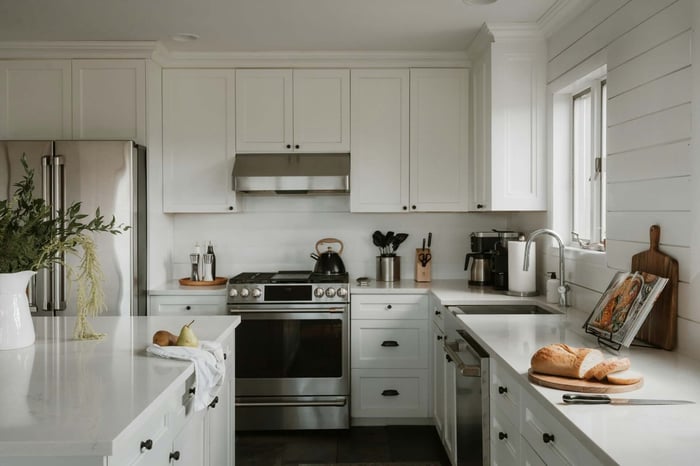

Standing in a brand-new kitchen full of appliances you've never touched can feel strange. Every surface is spotless, every appliance still has its plastic film on, and somewhere in the back of your mind is a nagging question: what happens if one of these breaks in six months and you never actually tested it?
A new construction walk-through appliance checklist gives you a clear way to catch problems before you sign anything. Testing every appliance, matching it to your contract, and documenting the results are the three things that protect you once you own the home. Builders move fast between the final walk-through and closing, and any issue you miss becomes yours to fix.
In this guide, you will find what to test room by room, what documents to request from the builder before you leave, and how builder warranties differ from manufacturer coverage. Set aside 60 to 90 minutes for the walk-through itself, and the steps below will tell you exactly what to do with that time.
Prepare Before You Enter the Home
Walking in with a plan turns a rushed appointment into a thorough inspection. Builders often schedule walk-throughs back-to-back, so the more organized you are going in, the less likely you are to miss something.
Pull your purchase contract, any selection sheets, and appliance spec pages before you leave the house. These documents tell you exactly what should be installed, down to brand and finish, and they become your reference point once you're standing in the kitchen.
Match Each Appliance to Your Contract
Compare every installed appliance against what your contract actually lists. Builders sometimes substitute models due to supply issues, and a substitution isn't automatically a problem, but it needs to match what you agreed to or be formally documented as a change.
Check these details against your paperwork for each appliance:
- Brand and model number
- Finish or color (stainless, black stainless, panel-ready)
- Size and capacity, especially for refrigerators and dishwashers
- Any listed upgrades, like a convection oven or a specific range hood CFM rating
If something doesn't match, note it immediately rather than assuming it will get resolved later. Bring your contract and confirm every selection before you sign off, since verbal promises from a sales visit rarely carry weight after closing.
Bring Tools for Testing and Notes
A few simple tools turn a passive walk-through into an active inspection. Bring a charged phone for photos and video, a notepad or note-taking app, and a roll of blue painter's tape to mark issues directly on surfaces.
Add a flashlight for checking under appliances and inside cabinets, plus a phone charger cable to test outlets near each appliance. These small items let you verify function on the spot instead of guessing.
With your documents and tools ready, you can move through each room and actually test what's installed instead of just looking at it.
Test Every Installed Appliance Before Closing
Every appliance in the home needs to run through at least one real cycle before you close, not just power on. A unit that turns on can still leak, vibrate, or fail to reach temperature, and those issues only show up once it's actually working.
Go system by system so you don't skip anything in the excitement of seeing a finished home for the first time.
Kitchen Appliances and Ventilation
Run the dishwasher through a full cycle and check underneath it for leaks once it finishes. Test every burner on the cooktop and run the oven to confirm it reaches the set temperature; also check the range hood, microwave, and any built-in vents for proper airflow.
Open and close the refrigerator doors to check the seal, confirm the ice maker and water dispenser work if installed, and listen for unusual compressor noise. Test the garbage disposal by running water while it operates, and check that all cabinet-mounted appliances are securely fastened.
Laundry Appliances and Connections
Run the washer through a short cycle and confirm the water supply lines aren't leaking at the connection points behind the machine. Check that the dryer vent connects properly to the exterior and isn't just resting near the wall.
Start the dryer on a short cycle and confirm it heats and the drum turns smoothly. If the laundry room includes a utility sink, run both hot and cold water and check the drain for backup.
HVAC Equipment, Water Heaters, and Other Home Systems
Set the thermostat to run both heating and cooling modes for a few minutes each, and confirm air actually flows from vents in every room. Check the water heater by running hot water at a faucet for several minutes and confirming the temperature climbs steadily without fluctuating.
Beyond these core systems, a few other checks matter just as much:
- Test every light switch and outlet, including GFCI outlets in kitchens and bathrooms
- Run the exhaust fans in every bathroom and confirm they vent to the exterior
- Check smoke detectors and carbon monoxide detectors for power and test buttons
- Confirm the garage door opener works and the safety reverse sensor stops the door
Once you've run and tested every appliance, the next task is to capture what you found, including anything that didn't work as expected.
Document Problems and Collect Home Records
Write down, photograph, and clearly flag every issue you find during the walk-through before you leave. Verbal agreements with the builder's representative don't hold up later, but a written punch list does.
This is also your best chance to collect the paperwork that will matter for years, not just for closing day.
Create a Clear Blue Tape Punch List
Mark every issue directly with blue painter's tape and write a short description on the tape itself. This keeps issues visible and location-specific rather than buried in a notebook.
For example, if the dishwasher leaks during its test cycle, tape a note directly on the front of the unit describing the leak, photograph it in place, and log the same issue in your notes with the date and time. This gives you three overlapping records of the same problem, which matters if the builder disputes it later.
Photograph Model and Serial Number Labels
Take a clear photo of the model and serial number label on every appliance before you leave. These labels are often on the interior door frame of a dishwasher, the back panel of a refrigerator, or inside the drum door of a washer, and they're easy to miss once appliances are in daily use. If a label wears out or becomes hard to read, this guide to decoding appliance model numbers can help.
These photos mean you never have to search for a hidden label later when you need to file a warranty claim or order a replacement part.
Request Manuals, Specifications, and Service Contacts
Ask the builder's representative for physical or digital copies of every appliance manual, along with HVAC and water heater spec sheets, on walk-through day. Also request a list of who to contact for service during your first year in the home. This resource for finding and storing appliance manuals covers what to do if any manuals are missing from the handoff.
Useful documents to request on the spot include:
- Owner's manuals for every major appliance
- Installation and warranty start dates for HVAC and the water heater
- A subcontractor or service contact list for plumbing, electrical, and HVAC
- Any product registration cards not yet submitted
Once you have this paperwork, the next step is understanding what it covers and for how long.
Understand Builder and Manufacturer Warranty Coverage
Two separate warranties usually apply to a new construction home, and confusing them is common. The builder's warranty covers the structure and workmanship, while manufacturer warranties cover the individual appliances themselves.
Knowing which one applies to a specific problem saves you time when something eventually needs repair.
How Builder Warranties Differ From Appliance Warranties
Builder warranties commonly follow a 1-2-10 structure, covering workmanship for one year, distribution systems like plumbing and electrical for two years, and major structural components for ten years.
2-10 Home Buyers Warranty, the national provider that actually administers this structure for builders across the country, describes it as "1 year surety coverage for workmanship, 2 years surety coverage for distribution systems and a full 10 years of third-party insurance-backed coverage for qualifying structural defects." Appliances themselves usually fall outside this structure and are covered instead by the manufacturer's own warranty terms.
For example, if your new home's HVAC blower motor fails in year one, that may fall under the builder's workmanship coverage. If the dishwasher's control board fails in year one, that's a manufacturer warranty claim instead, filed directly with the appliance brand rather than the builder.
No single nationwide standard applies, and the exact terms come from your builder's warranty documents. Read the warranty booklet you receive rather than assuming standard coverage applies.
Confirm Coverage Dates Before You Move In
Ask the builder's representative to confirm in writing the exact start date for both the builder warranty and each appliance's manufacturer warranty. These dates sometimes start at closing and sometimes start at the date of installation, which can be weeks earlier.
Getting these dates confirmed in writing, rather than assuming, closes a gap that causes real disputes when a homeowner files a claim only to be told the coverage window already passed.
Move In With Your Appliance Records Ready
The walk-through only pays off if you keep the information you gathered organized after you get your keys. A punch list, a stack of manuals, and a folder of photos are only useful if you can find them again months later. Folding this into a broader new-home checklist for your first 30 days keeps the walk-through paperwork from getting lost in the rest of the move.
Set up one place to hold every model number, warranty date, and photo before the boxes even start unpacking. This is exactly the moment Manse is built for: you can add your home, log each appliance's model and serial number from the photos you already took, and attach warranty start dates so they're never buried in a drawer.
Doing this in the first week, while the walk-through is still fresh, takes far less effort than reconstructing it after a repair call six months from now.
Frequently Asked Questions
What Should I Test on Appliances During a New Construction Final Walk-Through?
Run every appliance through a real cycle rather than just switching it on. Run a load in the dishwasher and washer, heat the oven, and check the water heater and HVAC for consistent output, since problems like leaks or uneven heating often show up only when an appliance is actually running.
Should I Run the Dishwasher During a New Home Walk-Through?
Yes, run the dishwasher through a complete cycle and check underneath it for leaks once it finishes. A quick power-on test won't reveal a leaking connection or a drainage issue that only appears mid-cycle.
What Appliance Documents Should the Builder Give Me Before Closing?
Ask for owner's manuals, warranty start dates for the HVAC and water heater, and a service contact list for plumbing and electrical issues. Request these on the day of your walk-through, since they're much harder to track down after closing.
What Is a Blue Tape Walkthrough in New Construction?
A blue tape walkthrough is when buyers mark every issue directly on the surface using painter's tape, then log each item on a written punch list before closing. It keeps problems visible and location-specific instead of buried in a notebook that's easy to lose track of.
How Do Builder Warranties Differ From Manufacturer Appliance Warranties?
Builder warranties typically cover workmanship and structural components for one to ten years, while manufacturer warranties cover the individual appliance itself, usually for one year on parts. A structural issue falls under the builder's coverage, while a broken appliance control board falls under the manufacturer's warranty instead.
Don't let the punch list be the only record of this day. Start your free home profile with Manse and keep every model number, warranty date, and walk-through photo in one place.